 English
资源说明:Simple steps to setup munin to monitor ubuntu server including nginx requests, memory and status
munin-nginx-ubuntu
==================
How's your server doing? Encharge your new rails server with stats from munin. This steps will take you through installing munin and the munin nginx plugins. Unless you haven't installed nginx follow the steps at [rails-nginx-passenger-ubuntu](http://github.com/jnstq/rails-nginx-passenger-ubuntu). But in the configure add --with-http_stub_status_module argument.
If you already installed nginx, check the latest configure argument with the -V flag and recompile it with --with-http_stub_status_module
$ /opt/nginx/sbin/nginx -V
nginx version: nginx/0.7.63
configure arguments: --prefix=/opt/nginx --add-module=/opt/ruby/lib/ruby/gems/1.8/gems/passenger-2.2.5/ext/nginx --with-http_ssl_module --with-pcre=/home/deploy/src/pcre-8.00/
About Munin
===========
Munin the monitoring tool surveys all your computers and remembers what it saw. It presents all the information in graphs through a web interface. Its emphasis is on plug and play capabilities. After completing a installation a high number of monitoring plugins will be playing with no more effort.
Using Munin you can easily monitor the performance of your computers, networks, SANs, applications, weather measurements and whatever comes to mind. It makes it easy to determine "what's different today" when a performance problem crops up. It makes it easy to see how you're doing capacity-wise on any resources.
[Munin website](http://munin-monitoring.org/) | [MuninExchange plugin catalog](http://exchange.munin-monitoring.org/plugins/nginx_memory/version/1/download)
Out of the box it comes with a lot of useful stats for a rails developer (and system administrator). For example cpu, forks, interrupts. iostat. irqstats. load. memory, mysql_bytes, mysql_queries. mysql_slowqueries. mysql_threads. netstat, open_files, open_inodes, processes, sendmail_mailqueue, sendmail_mailstats, sendmail_mailtraffic, swap amd vmstat
Recompiling
===========
cd
mkdir -p src
cd src
# PCRE Library
wget ftp://ftp.csx.cam.ac.uk:21/pub/software/programming/pcre/pcre-8.00.tar.gz && tar xvfz pcre-8.00.tar.gz && rm pcre-8.00.tar.gz
# Nginx source
wget http://sysoev.ru/nginx/nginx-0.X.YY.tar.gz && tar xvfz nginx-0.X.YY.tar.gz && rm nginx-0.X.YY.tar.gz
cd nginx-0.X.YY
./configure --prefix=/opt/nginx [--add-module=/opt/ruby/lib/ruby/gems/1.8/gems/passenger-2.2.5/ext/nginx] [--with-http_ssl_module] --with-pcre=~/src/pcre-8.00/ --with-http_stub_status_module
make
sudo make install
Munin and Munin-node
--------------------
We will install both munin master and munin node on the same machine.
sudo apt-get install munin munin-node
Edit the file /etc/munin/munin.conf and after the comment # a simple host tree change the follwing lines
[yourdomain.com]
address 127.0.0.1
use_node_name yes
This will tell munin to connect to munin-node at 127.0.0.1 on the same machine.
Edit the file /etc/munin/munin-node.conf and change # Which port to bind to set
host 127.0.0.1
Make sure that this is present in the file
allow ^127\.0\.0\.1$
Nginx
-----
Configure stub status
# Nginx status
server {
listen 80;
server_name localhost;
location /nginx_status {
stub_status on;
access_log off;
allow 127.0.0.1;
deny all;
}
}
Restart nginx and make sure this works with
telnet localhost 80
# and write
GET /nginx_status
# Should respond with
Active connections: X
server accepts handled requests
X X X
Reading: X Writing: X Waiting: X
OR
links http://localhost/nginx_status
Add a new vhosts for the munin-graph
server {
listen 80;
server_name stats.yourdomain.com;
location / {
allow SOME.IP.ADDRESS;
deny all;
root /var/www/munin;
}
}
Munin nginx plugins
-------------------
cd /usr/share/munin/plugins
sudo wget -O nginx_request https://raw.github.com/munin-monitoring/contrib/master/plugins/nginx/nginx_request
sudo wget -O nginx_status https://raw.github.com/munin-monitoring/contrib/master/plugins/nginx/nginx_status
sudo wget -O nginx_memory https://raw.github.com/munin-monitoring/contrib/master/plugins/nginx/nginx_memory
sudo chmod +x nginx_request
sudo chmod +x nginx_status
sudo chmod +x nginx_memory
sudo ln -s /usr/share/munin/plugins/nginx_request /etc/munin/plugins/nginx_request
sudo ln -s /usr/share/munin/plugins/nginx_status /etc/munin/plugins/nginx_status
sudo ln -s /usr/share/munin/plugins/nginx_memory /etc/munin/plugins/nginx_memory
Edit /etc/munin/plugin-conf.d/munin-node and add the lines
[nginx*]
env.url http://localhost/nginx_status
Restart munin-node with
sudo /etc/init.d/munin-node restart
CentOS Note
------------------
Everything seems to work on Centos 5.5 with one small exception: pidof lives in /sbin and the nginx_memory plugin expects it to be in the PATH.
There are several solutions:
1. symlink pidof to /bin
2. add /sbin to PATH (not recommended)
3. edit the plugin and change pidof to be /sbin/pidof
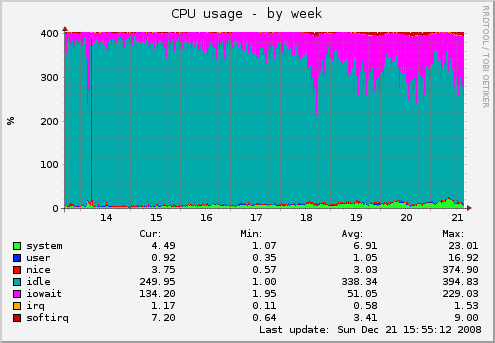
Browse to stats.yourdomain.com
----------------------------------
Wait 5 minutes so munin will generate the graphs then go to http://stats.yourdomain.com
本源码包内暂不包含可直接显示的源代码文件,请下载源码包。